craftredo

Just another WordPress.com site

February Craft Class – Valentine String Art January 26, 2014

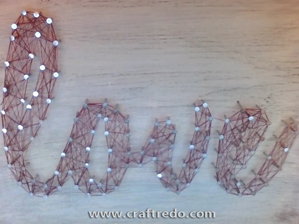
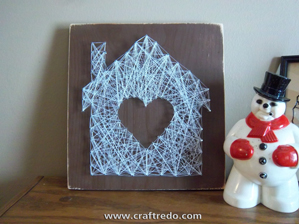
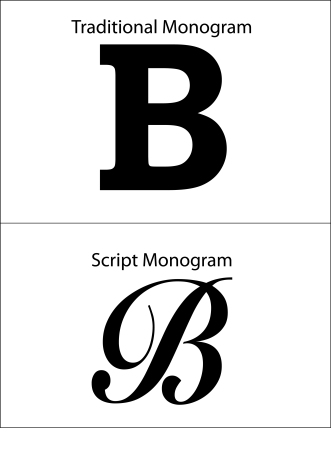
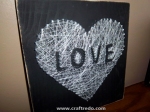
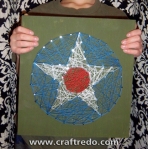
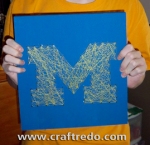
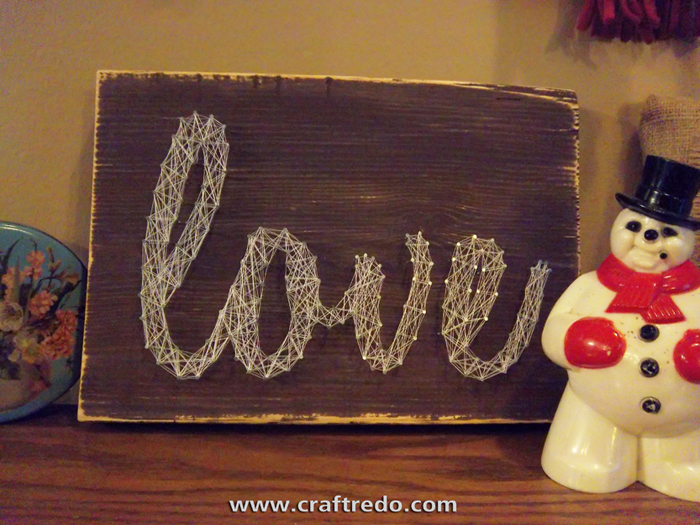
We have a craft planned for our February session that you’ll just love! String art is making a come-back and boy do we have some amazing tips and tricks in helping you create the most wonderful Valentine treat. Crafters will have the opportunity to choose from 2 Valentine themed designs: Love & Heart-N-Home. OR if you’d rather have a more traditional layout, you can choose a Monogram in either Script or Traditional type font.

loveSTRGcraftredo

craftredo

red loveheartNhome

craftredo

craftredo

craftredo

craftredo

craftredo

craftredo

craftredo

craftredo

craftredo

craftredo

craftredo

craftredo

craftredo

craftredo

craftredo

craftredo

If you have a hair dryer, hammer & needle-nose pliers bring ‘em. We’ll have some available, BUT depending upon how many crafters we have sign up . . . well . . . if you have your own, you won’t have to share and/or wait to get craftin’.

craftredo

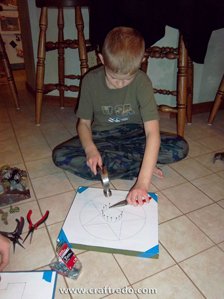
If the complexity of the class concerns you, don’t worry. We had our kids try it out first and they soared! Peek at the photo, that’s why it’s best to bring your own hammer and pliers. The pliers will save your fingers!

holding pliers

craftredo

Craft class is Sunday, February 2nd (Yes, we ARE aware that’s Super Bowl Sunday. You’ll be done before the game starts.)
1:00pm – 4:00pm (*NOTE time difference. We needed a little more time with this craft.)
Class will be held at Brandon Elementary Art Room, (Martin Public School) 1619 University Street; Martin, Michigan 49070.

craftredo

To register, send us an email at: craftredo@aol.com

When you register we need to know:
Your background paint color,
Thread color,
AND
1 design choice:
Love,
Heart-N-Home,
Monogram letter (Be sure to let us know which letter and which type font: Script or Traditional, you would like to use.) If you DO choose the Monogram style, we suggest picking the Traditional style. The Script is a little more advanced. AFTER attending the class you’ll feel confident to tackle the Script.

When selecting your background color and thread color, we suggest choosing contrasting colors. We found that dark backgrounds with light thread work best.

monogram

craftredo

Register by Thursday, January 30th.

craftredo

Cost for the session is $20 per person. Please bring payment to the craft class. All supplies will be provided by Katie and Korene.

craftredo

Feel free to bring your own treats and drinks. No alcoholic beverages, please.

craftredo

We ask that we keep the session for adults only (no kids please). Teens 13 and up are welcome to attend, but must be accompanied by a paid adult. Feel free to invite friends.

craftredo

Here’s a link for the directions to the school: http://www.martinpublicschools.org/schools/brandonel/directions

craftredo

Enter through the main entrance on the West side of the building (Elementary entrance). Please park in the parking lot – NOT the loop or the student drop off area. Please arrive around or before 1:00, we will be locking the exterior doors (for our safety) a little bit after 1:00.

craftredo

Don’t forget: There will be a table set out if you would like to display a flyer/brochure of what YOU do. Are you an exercise instructor, product consultant, the head of an organization? Bring a brochure or flyer to display on the table.

craftredo

After the craft session, you’ll have the knowledge and skill to create layouts like these:

This is a really fun craft. Hope to see you Sunday!
 

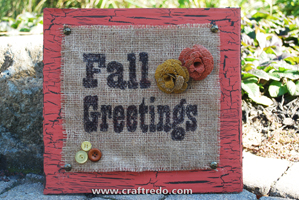
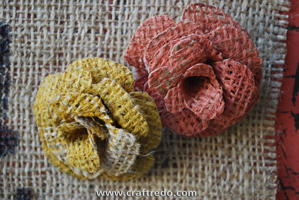
September Craft Class – Fall Burlap Board w/ Burlap Flower Embellishments September 24, 2013

craftredo

craftredoGLAM FULL 009

Crafters will learn many new and exciting techniques during the session. Techniques include:

  • Rustic crackle paint technique (using a household item that most everyone has on hand)
  • Transferring letters onto burlap
  • Creating burlap flowers (they are amazingly fun to make)

craftredo

Craft class is THIS Sunday, September 29th
2:00pm – 4:00pm
Brandon Elementary Art Room (Martin Public School) 1619 University Street; Martin, Michigan 49070.

craftredo

Register no later than Thursday night, September 26th (we will be shopping for supplies on Friday).

craftredo

To register, send us an email at: craftredo@aol.com

craftredo

Cost for the session is $20 per person. Please bring payment to the craft class. All supplies will be provided by Katie and Korene.GLAM FLOWERS 012

craftredo

Feel free to bring your own treats and drinks. No alcoholic beverages, please.

craftredo

We ask that we keep the session for adults only (no kids please). Teens 13 and up are welcome to attend, but must be accompanied by a paid adult. Feel free to invite friends.

craftredo

Here’s a link for the directions to the school: http://www.martinpublicschools.org/schools/brandonel/directions

craftredo

Enter through the main entrance on the West side of the building (Elementary entrance). Please park in the parking lot – NOT the loop or the student drop off area. Please arrive around or before 2:00, we will be locking the exterior doors (for our safety) a little bit after 2:00.

craftredo

Don’t forget: There will be a table set out if you would like to display a flyer/brochure of what you do. Are you an exercise instructor, product consultant, the head of an organization? Bring a brochure or flyer to display on the table.


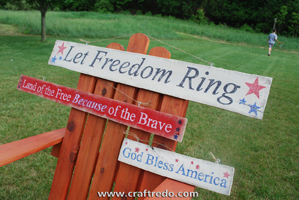
Patriotic Quote Sign – Praise And Coffee The Magazine July 10, 2013


Thank you Praise And Coffee for allowing us to feature an article in their magazine. Here’s the link: http://issuu.com/praiseandcoffee/docs/summer_2013/50?e=1741187%2F3985515


We love the distressed look. The more grungy, dirty, rusty, worn and faded an object is . . . the better. We have easy instructions for creating your very own rustic qu

ote sign. The great part is you probably have most of the items already.Glam Patriotic 0171SMALL

CRAFTREDO

CRAFTREDO

CRAFTREDO

You will need:

  • Weathered wood roughly cut to the size you need (Our wood was from old skids. We had 2 different widths, 5 1/2” and 3 1/4”). Check out the post ‘Wood and Ribbon Cross Craft – Praise and Coffee the Magazine’ for tips on collecting weathered wood.
  • Brown paper bag
  • Acrylic paint – Do you happen to have 1/2 of a gallon of paint from when you decided to repaint your bedroom light blue or the living room taupe? Go grab that. Use what you have.
  • Sharpie markers or white paint pen (if you are using a light color for the background of the board you will need a dark colored Sharpie. If you will be using a darker color for your background (navy, black, red, etc) you will need to use the white paint pen)
  • Various tapes – For this project, we used blue tape and clear tape
  • Sand paper or sanding block (Various grits – You may find that light-weight grits work best)
  • Jute string
  • Screw eyes
  • Drill
  • Pencil
  • Paint brush
  • Scissors
  • Red or blue ink pen
  • Computer print out of quote

CRAFTREDO

CRAFTREDO

CRAFTREDO

Directions:

  1. Trim the weathered wood to desired size. Crinkle up brown paper bag, lightly ‘sand’ board with brown paper bag. (It may be a good idea to use protective gloves so you won’t get a sliver.) You want to get the dirt, debris and frayed wood off of the board, without losing the integrity of the weathered wood. By using the brown paper bag, it lightly sands and gets all the stray pieces of fibers off the board.
  2. Lightly paint one side of the board. Do not paint the surface entirely – Have the paint ‘feather out’ to the edges, exposing the weathered wood texture.
  3. Print out your favorite quote from your computer. Helpful tip: On your computer, create a file the size of your board, place type into the file, print it out as ‘tiles’. Tape printouts onto a window to help line up the type, tape printouts together. It’s A-O.K. if printouts overlap.
  4. To transfer words onto the board – Turn printout over and cover the backs of the letters with graphite from the pencil. Hold paper up to the light to make sure you are getting all the parts of the letters covered with graphite.
  5. Tape quote printout onto board with blue painter tape.
  6. Trace the outer edges of the letters with a blue or red pen. By using the blue or red pen, you will be able to see the areas you have traced and the areas you have not traced. When done tracing do NOT take paper totally off, leave it attached at the top. Carefully lift paper up to ensure you have transferred over all of the parts of the letters. You may need to place the paper  back down onto the board to trace areas you’ve missed. Helpful tip: If you are using a really dark background and are finding out that the graphite from the pencil is hard to see – Try using a colored white pencil or chalk instead of the graphite.
  7. With the Sharpie (or white paint pen) simply color in your letters. Yes, it’s THAT simple.
  8. Allow letters to fully dry. Letting the letters dry overnight is best, but usually we don’t have that type of patience so we get out the hair dryer.
  9. With a sanding block or sand paper, lightly sand the letters and background. It’s awesome to see. The board will start to ‘distress’ right before your eyes.
  10. Grab the drill and drill 2 holes on the top edge of the board – This is how you’ll hang the board. We drilled holes about 2-3 inches from each end. Screw in screw eyes. You may need to use a random nail to help twist in the screw eyes. Don’t screw in the eyes all the way, they may break. Be careful when drilling your holes and screwing in the eyes – We’ve ‘lost’ many bits and eyes, they break right off in the wood, if you’re not careful. If you’re using wood from a skid, it will more than likely be a hard wood which can cause the bits and eyes to break off if the items are forced into the wood. If that does happen, move over a bit and re-drill. It just adds to the character.
  11. Tie one end of the jute string to an eye. Leave about 2 inches of tail. We fray the ends of the tail, which adds to the distressed charm. Stretch out string to the other screw eye, tie-off (leaving a tail) & trim, fray tail.

craftredo

There you go! You’re a distressed board-making rock star!

CRAFTREDO

CRAFTREDO

CRAFTREDOHow

How-To

This slideshow requires JavaScript.

CRAFTREDO

CRAFTREDO

CRAFTREDO

Photos from our ‘quote sign’ craft class session.

This slideshow requires JavaScript.


April Craft Class April 20, 2013

Rustic Quote Signsign 3202

Katie and Korene will show crafters how to create their very own custom rustic-looking quote sign.

Sunday, April 28th
2:00pm – 4:00pm
Brandon Elementary Art Room (Martin Public School) 1619 University Street; Martin, Michigan 49070

Register no later than Thursday, April 25th. Have a favorite quote you would like to use? Email quote to craftredo@aol.com by THURSDAY, APRIL 25th (keep quote to no more than 7 words). We will provide quotes to choose from if we don’t receive your quote by the 25th.

To register, send us an email at: craftredo@aol.com
Cost for the session is $20 per person. Please bring payment to the craft class. All supplies will be provided by Katie and Korene.

Feel free to bring your own treats and drinks. No alcoholic beverages, please.

We ask that we keep the session for adults only (no kids please). Teens 13 and up are welcome to attend, but must be accompanied by a paid adult. Feel free to invite friends.

If you happen to have a hair dryer, bring it. We will have some available to use – but if you can bring your own dryer, feel free to do so.

Here’s a link for the directions to the school: http://www.martinpublicschools.org/schools/brandonel/directions
Enter through the main entrance on the West side of the building (Elementary entrance). Please park in the parking lot – NOT the loop or the student drop off area. Please arrive around or before 2:00, we will be locking the exterior doors (for our safety) a little bit after 2:00.

Don’t forget: There will be a table set out if you would like to display a flyer/brochure of what you do. Are you an exercise instructor, writer of a magazine, the head of an organization? Bring a brochure or flyer to display on the table.

craftredo

craftredo

Want to order a quote sign. Email us at craftredo@aol.com


March Craft Session March 16, 2013

chalk glam 3154
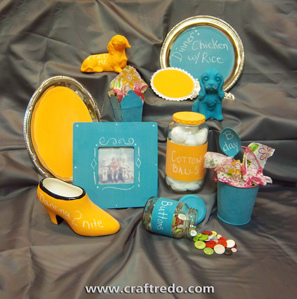
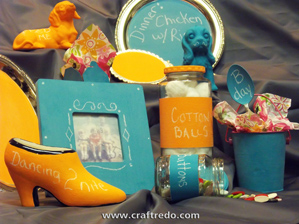
Custom-Colored Chalkboard Paint

Katie and Korene will show crafters how to create their very own custom-colored chalkboard paint. Crafters will also have the opportunity to use the paint on 4 surfaces (provided by Katie & Korene): wood, metal, glass, cardboard.

Sunday, March 24th
2:00pm – 4:00pm
Brandon Elementary Art Room (Martin Public School) 1619 University Street; Martin, Michigan 49070
Register no later than Thursday, March 21st.
To register, send us an email at: craftredo@aol.com
Cost for the session is $20 per person. Please bring payment to the craft class. All supplies will be provided by Katie and Korene.

Feel free to bring your own treats and drinks. No alcoholic beverages, please.

We ask that we keep the session for adults only (no kids please). Teens 13 and up are welcome to attend, but must be accompanied by a paid adult. Feel free to invite friends.

If you happen to have a hair dryer, bring it. We will have some available to use – but if you can bring your own dryer, feel free to do so.

Here’s a link for the directions to the school: http://www.martinpublicschools.org/schools/brandonel/directions
Enter through the main entrance on the West side of the building (Elementary entrance). Please park in the parking lot – NOT the loop or the student drop off area.

Don’t forget: There will be a table set out if you would like to display a flyer/brochure of what you do. Are you an exercise instructor, writer of a magazine, the head of an organization? Bring a brochure or flyer to display on the table.

chalk close


Capturing Winter – Framed Ice Skates January 5, 2013

craftredolrGLAMa

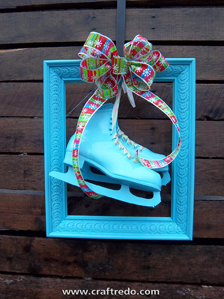
Frames are a great, inexpensive way to showcase just about any item. Any time we are shopping at a resale shop, Goodwill®/Salvation Army® or garage sale our sights are always on the look out for unique picture frames. We prefer frames with bold details and solid construction. So when you’re out and about, keep your eyes peeled for picture frames. Now, grab a can of paint and let’s get going.

craftredo

You will need:

  • Frame
  • Set of ice skates (check garage sales, resale shops, Goodwill/Salvation Army, your own basement or garage)
  • Ribbon – a wider ribbon (for main bow) and a coordinating smaller width ribbon (small enough to go through eyelets of skates, this ribbon will replace the shoestrings from the skates)
  • Spray paint
  • Drill
  • Screw and a washer
  • Drop cloth
  • Wood block scraps (optional)
  • Screw eyes and wire (for hanging)
  • Wiping cloth (discarded washcloth, T-shirt, sock, etc)

craftredo

Directions:

  1. Take shoestrings out of skates, save shoestrings for later.
  2. Remove glass and backing materials from frame. Lightly sand frame. Wipe down frame and skates with a cloth, making sure dirt and dust have been removed.
  3. Lay down drop cloth. At this point, lay down wooden blocks (optional). We use wooden blocks to prop up items when spray painting. Doing so, makes it a bit easier to get full coverage of the items you’re painting.
  4. Spray paint frame and skates (both sides). Allow to fully dry. Apply another coat. Allow to fully dry.
  5. Lace up skates with the smaller ribbon. Use the original shoestrings to measure the length of the ribbon you’ll need. Twist ribbon so the front design of the ribbon shows. If you’re having trouble with the ribbon fitting through the eyelets, wrap the ends of the ribbon with tape.
  6. Attach skates onto the back of the frame by screwing a screw (and a washer) through both sets of ribbon. Puncture a pilot hole through the ribbon first (use a utility knife or nail). With the drill, carefully screw the screw through the ribbon first and then onto the back of the frame. You’ll need a partner to help hold the ribbon while the other person screws the screw through the ribbon. Go very slow with the drill. (Here’s the placement of items: Washer first, put the screw through the hole of the washer, screw the ribbon on, then attach entire group onto the back of the frame)
  7. To hang the piece, we attached screw eyes onto the back of the frame. Attach screw eyes on each side of the back of the frame, about 1/4 of the way from the top. String wire through a screw eye, wrap wire around itself to attach to screw eye. Pull wire through other screw eye, holding up piece to see if more or less wire is needed, wrap wire around itself, trim excess wire. You will be able to hang the piece from this wire with a sturdy wreath hanger.
  8. Attach bow with wire (or hot glue or your favorite adhesive). Wrap the wire around the frame, twisting the wire together at the back of the frame for a secure hold.

craftredo

How to make a bow:
Our friend Tammy showed us how to make the beautiful bow. We used a spool of ribbon that was 9 feet long and it was just enough.

  1. Unroll ribbon. Leave a ‘tail’ that’s about 14 inches long, this will be the ribbon end that hangs down.
  2. Fold ribbon back and forth onto itself, making a figure eight shape (check out the pictures, you’ll get a better idea of what’s going on here). Do this four times so you’ll have 4 soon-to-be bows on each side. Our bows measured roughly 8 inches across the entire figure eight shape.
  3. Hold ribbon together temporarily with a paper clip.
  4. With floral wire, wrap wire around the center of the ribbon and twist to secure. Remove paper clip when wire is securely attached.
  5. For the center of the bow, do one loop to one of the sides and attach it to the main ribbon with the wire. Our center measured roughly about 2 inches across.
  6. Twist wire on the back of the bow so it’s all secure.
  7. Spread out the bows. You may need to turn some of the bows right-side-out.
  8. Trim ends of the ribbon at an angle.

craftredo

Get bold and unique with your color choices.

craftredo

Crafter’s Note: We recommend placing the framed skates in an area that will not have a lot of movement. A door that doesn’t get opened, a wall, etc. Definitely do NOT hang them over a window. The skates are quite heavy. We also recommend to keep the piece in an area that may be protected by the elements. Rain, snow and extreme cold may cause the paint on the skates to peel or crack. The skates are usually made out of leather and the leather may expand/contract due to the temperature change. My skates are hanging inside the house, in our foyer over a closet door (with a very heavy wreath hook). Also, do not hang the piece over an area where children play. Again, the skates are extremely heavy and there always is a possibility of the piece falling. Use thoughtful judgment when hanging your skates.

craftredo

This slideshow requires JavaScript.


Bookmark Craft December 18, 2012

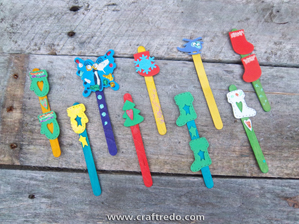
FOAM BOOKMARKS

Here’s a quick and easy craft, that’s great for kiddos of all ages.

craftredo

You will need:

  • Popsicle sticks (colored or natural)
  • Foam shapes (seasonal or everyday shapes)
  • Glitter glue or white glue
  • Embellishments: glitter, googly eyes, gems, sequins, etc.
  • Paints or markers (optional)

craftredo

Directions:

Let the kids attach foam shapes to popsicle sticks using glitter glue or white glue. Embellish with glitter, gems, markers, paints, etc.

craftredo

We’ve used these to decorate holiday packages, had puppet shows with them, gave them as teacher and Valentine’s Day gifts, Christmas tree ornaments, grandparents love them, glued magnets onto them . . . oh, and we’ve also used them as bookmarks.


Fall Letter Craft November 4, 2012

We were thankfully given another wonderful opportunity to feature a craft project in the Fall issue of ‘Praise and Coffee the Magazine’. So . . . . if you want to learn how to do this craft, you’ll have to check out this amazing magazine.

craftredo

Click on the magazine icon below to link to the craft directions.

craftredo

craftredo

craftredo

craftredo

craftredo

craftredo

craftredo

craftredo

craftredo

craftredo

craftredo

craftredo

craftredo

craftredo

craftredo

craftredo

craftredo

This slideshow requires JavaScript.

craftredo

craftredo


Halloween Silhouette Plates September 1, 2012

I relish the idea of having a wall dedicated to holiday appropriate white plates that could be changed out every season. I started pricing out plain, white, ceramic plates and quickly found out that my vision well exceeded my pocket book. So I came up with this.

craftredo
You will need:

  • White paper plates (The plates I used were coated on one side and had a pearly white color to them, plain white plates will work as well. Check the party area in your store.)
  • Mod Podge
  • Paint brush
  • Scrapbooking silhouettes, check your local craft store (I found mine at a ‘Dollar Tree’ store, they were a buck a piece for a pack of 15)
  • File folder without pockets
  • Black glitter (optional)
  • Black marker (optional)
  • Blue painter’s tape
  1. Cover work surface with wax paper or some type of plastic sheeting so the Mod Podge will not stick to the surface.
  2. Adhere silhouette to plate with Mod Podge.
  3. Cover/paint silhouette and entire plate with Mod Podge, allow to fully dry.
  4. Make ringlets with blue tape, place ringlets onto back of plate, attach paper plate to wall. Be careful with the blue tape. Some DO state on the packaging that if it’s left on a surface for a long period of time, it will become permanent. Read manufactures labeling.

craftredo

If you want to further embellish your creation – highlight areas of your plate with glitter.

  1. Paint the edge of the plate with Mod Podge or a certain area of the silhouette (owl’s tree branch) or the entire silhouette.
  2. Sprinkle black glitter on top of the Mod Podge.
  3. Shake of excess glitter. I left some glitter behind on my plate to add to the spookiness.

Hint: Shake off excess glitter over file folder. Slightly fold file folder and pour remaining glitter back into glitter container.

craftredo

You could also create your own silhouettes using a black Sharpie® marker or black paint. Research images on the internet for reference.

craftredo

When storing plates, place a sheet of wax paper between them so they won’t stick together.

craftredo

You can switch out plates every season/holiday.

craftredo

This slideshow requires JavaScript.


We’ve Made Our Magazine Debut! July 18, 2012

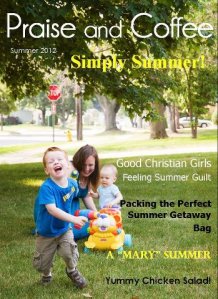
We were given the wonderful opportunity to feature a craft project in the Summer issue of ‘Praise and Coffee the Magazine’. So . . . . if you want to learn how to do this craft, you’ll have to check out this amazing magazine.

Here’s the link: http://praiseandcoffee.com/2012/07/its-here-summer-2012-praise-and-coffee-magazine/

craftredo

craftredo

craftredo

craftredo

craftredo

craftredo

craftredo

craftredo

craftredo

craftredo

craftredo

craftredo

craftredo

Samples

This slideshow requires JavaScript.

craftredo

craftredo

craftredo

craftredo

craftredo

craftredo

craftredo

Click below image to link with ‘Praise and Coffee the Magazine’ website: